How to Make Ridge Cap Shingles from 3-Tab?
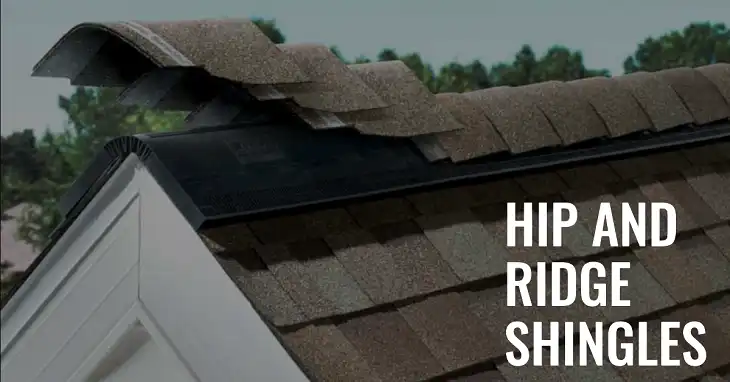
Ridge cap shingles play a crucial role in protecting your roof. These specialized shingles cover the peak of your roof by shielding it from wind, rain, snow, and debris. While dedicated ridge cap shingles are the ideal choice, some homeowners consider making their own from 3-tab shingles as a cost-saving measure.
This article will tell you, how you can do it too, what are its benefits and what are the drawbacks of this DIY approach. Let’s begin.
What are Ridge Cap Shingles
Ridge cap shingles are designed to provide a weatherproof seal along the highest points of your roof. They’re typically thicker and more flexible than standard shingles, allowing them to bend over the ridge without cracking. Using 3-tab shingles as a substitute can save money, but it’s important to understand that this method may not offer the same level of protection or longevity as purpose-made ridge caps.
Tools & Materials You’ll Need to Cut 3-Tab into Ridge Shingles
Before embarking on this project, gather the following materials:
- 3-tab shingles (preferably new and undamaged)
- Galvanized roofing nails
- Self-sealing roofing cement (optional)
You’ll also need these tools:
- Sharp utility knife with replaceable blades
- Metal straightedge or ruler
- Chalk line
- Measuring tape
Making Ridge Cap Shingles from 3 Tab
Step 1: Preparation
Choose a flat, level workspace away from hazards like power lines. If you’re working on a sunny day, keep most of your shingles covered to prevent sun damage. The ideal temperature for working with asphalt shingles is between 40°F and 85°F (4°C to 29°C). Working in extreme temperatures can make the shingles too brittle or too pliable, affecting their performance.
Step 2: Cutting 3-Tab Shingles into Ridge Caps
Start by examining your 3-tab shingles. You’ll notice pre-cut notches that divide the shingle into three equal sections. These will guide your cuts.
To cut the shingles:
- Place the shingle on a sturdy surface with the granule side up.
- Align your metal straightedge along the notches.
- Hold the shingle firmly with your non-dominant hand, keeping fingers well away from the cutting line.
- Using your dominant hand, cut along the straightedge with a sharp utility knife. Use a sawing motion for a clean cut.
- Repeat for the other section, creating three equal pieces.
Each piece should be about 12 inches wide and 36 inches long. The center of each piece should have a slightly raised profile to allow for proper bending over the ridge.

Pro tip: Practice on a few scrap shingles before cutting the ones you’ll use on your roof. This will help you perfect your technique and ensure consistent results.
Step 3: Installation Process
When you’re ready to install your homemade ridge caps, follow these steps:
- Start at the end of the ridge opposite the prevailing winds. This helps prevent wind from lifting the exposed edges.
- Position the first ridge cap shingle so it overhangs the edge of the roof by about 1/2 inch.
- Nail the shingle in place using two roofing nails on each side, about 1 inch from the edge and 6 inches up from the exposed edge.
- Continue along the ridge, overlapping each new shingle by 5 to 6 inches over the previous one.
- For added protection, apply a thin bead of roofing cement along the bottom edge of each shingle before nailing it down.
Remember to maintain proper ventilation under the ridge caps. Ensure your roof has adequate soffit and ridge vents to prevent moisture buildup and potential rot.

Weather Considerations and Climate Adaptation
The effectiveness of DIY ridge caps can vary depending on your local climate. In areas with high winds, consider using four nails per shingle instead of two. For regions with heavy snowfall, you might want to increase the overlap to 6 inches or more.
In hot climates, be aware that 3-tab shingles used as ridge caps may be more prone to cracking or curling due to intense sun exposure. In these areas, it’s particularly important to weigh the cost savings against the potential for more frequent replacements.
Cost Analysis: DIY vs. Pre-made Ridge Caps
While making your own ridge caps can save money upfront, it’s important to consider the long-term costs. Here’s a comparison:
| Aspect | DIY 3-Tab Ridge Caps | Pre-made Ridge Caps |
| Initial Cost | Lower | Higher |
| Installation Ease | More labor-intensive | Easier to install |
| Durability | Less durable | More durable |
| Weather Resistance | Moderate | High |
| Lifespan | 10-15 years | 20-30 years |
| Aesthetics | May not match well | Designed to match |
| Warranty | Often voided | Typically covered |
As you can see, while DIY ridge caps might save you money initially, they may end up costing more in the long run due to more frequent replacements and potential warranty issues.
Alternatives and Professional Advice
While DIY ridge caps can be a temporary solution, using dedicated ridge cap shingles is generally the best choice for long-term roof protection. These products are specifically designed to withstand the unique stresses at the roof’s peak.
If you’re unsure about tackling this project yourself, consider consulting a professional roofer. They can assess your roof’s condition and recommend the best course of action. To find a qualified contractor, check with local roofing associations or use online services that verify credentials and customer reviews.
Frequently Asked Questions
How many feet of ridge cap can you get per bundle of 3-tab shingles?
Typically, one bundle of 3-tab shingles can produce about 35 linear feet of ridge cap. This assumes you’re cutting each shingle into three pieces and using a 5-inch exposure. However, this can vary slightly depending on the specific shingle brand and how you cut them.
How do you calculate the number of 3-tab shingles needed for a roof?
To calculate 3-tab shingles, measure the square footage of your roof and divide by 100 to get the number of “squares” needed. One square covers 100 square feet. A typical bundle of 3-tab shingles covers about 33.3 square feet. So, you’ll need three bundles per square. Always add 10-15% extra for waste and cuts.
What is the standard size of a 3-tab shingle?
Standard 3-tab shingles are typically 36 inches long and 12 inches wide. When installed, they have an exposure (visible area) of about 5 inches. However, some manufacturers may have slightly different dimensions, so always check the product specifications.
What is the minimum roof pitch for 3-tab shingles?
The minimum recommended pitch for 3-tab shingles is typically 4/12, which means the roof rises 4 inches for every 12 inches of horizontal run. Some manufacturers may allow installation on slopes as low as 2/12, but this often requires special underlayment and installation techniques.
How long can 3-tab shingles last?
With proper installation and maintenance, 3-tab shingles typically last between 15 to 20 years. However, this can vary significantly based on climate conditions, roof ventilation, and the quality of installation. In harsh climates, they may need replacement sooner.
How do you keep 3-tab shingles straight during installation?
Use chalk lines as guides for each row. Start with a straight line at the bottom of the roof and mark lines every 5 inches (or whatever your exposure should be) up the roof. Use these lines to keep your shingles aligned. Also, frequently check your work from the ground to spot any waviness or misalignment.
Can you install new shingles over existing 3-tab shingles?
While it’s possible in some cases to install new shingles over existing ones (known as a “roof-over”), it’s generally not recommended, especially with 3-tab shingles. This practice can hide underlying issues, add excess weight to the roof structure, and may void manufacturer warranties. It’s usually better to completely remove the old shingles before installing new ones.
Final Words
Creating ridge cap shingles from 3-tab shingles can be a cost-effective DIY solution, but it comes with trade-offs in terms of durability and weather resistance. While this guide provides the steps to do it yourself, it’s crucial to weigh the short-term savings against potential long-term costs and reduced effectiveness.
For many homeowners, the peace of mind that comes with professionally installed, purpose-made ridge cap shingles is worth the extra upfront cost. Whatever you decide, ensuring your roof is properly protected at its highest points is crucial for the overall integrity of your home.


