Rain Diverters: What Are Those & Should You Install One On Your Roof
Rain diverters are roof additions designed to redirect water flow away from areas vulnerable to water exposure, such as doorways, walkways, and air conditioning units. These often-overlooked tools prevent water damage, help with safety, and reduce the risk of costly repairs over time. This guide breaks down everything you need to know about rain diverters, from types and materials to installation steps, maintenance tips, and alternative solutions, helping you make the right choice for your home.
What Are Rain Diverters?
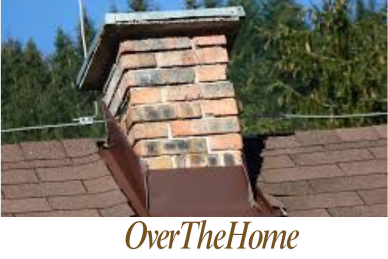
A rain diverter is a specific piece of flashing—usually crafted from metals like aluminum, galvanized steel, or copper—installed under roof shingles at an angle. Its main role is to divert rainwater away from high-traffic areas, minimizing water pooling and runoff that could lead to damage. Unlike gutters, rain diverters don’t channel water to a designated drain but redirect it to safer, less exposed areas.
Types of Rain Diverters
Rain diverters come in a variety of styles to suit different needs and roof structures:
- Roof Valley Rain Diverter: Installed in the valley where two roof planes meet, protecting these naturally water-prone areas.
- Corner Roof Rain Diverter: Placed on roof corners to help with water drainage where typical gutters might fall short.
- Over-Door Rain Diverter: Installed above doors and walkways to direct water away from entry points, keeping doorsteps dry and safe.
Each type is available in various materials, with metal diverters providing strength and durability. PVC diverters are another option, often used for lightweight or temporary solutions, though metal remains the more popular choice for longevity.
When & Why You Should Install a Rain Diverter?
Installing a rain diverter brings several benefits, particularly when it comes to home preservation and safety.
- Protects People and Property: Rain diverters shield doorways, walkways, and windows, reducing water exposure for both people and structures. This is particularly useful for homes with exposed entries or buildings in high-rainfall areas.
- Prevents Damage: By redirecting water flow, diverters help prevent common issues such as wood rot, water pooling, erosion around foundations, and potential leaks. They’re also effective in areas prone to ice dams in colder months.
- Improves Safety: Water accumulation around entrances can lead to slippery surfaces. Rain diverters help reduce these risks, making entrances safer for residents and visitors alike.
How to Choose the Right Rain Diverter for Your Roof?
Choosing a rain diverter requires a good understanding of materials, sizes, and placement to ensure you get the best performance. Here’s a breakdown of what to consider:
Material Considerations
Each material brings unique strengths:
- Aluminum: Lightweight, corrosion-resistant, and generally affordable. Suitable for most homes and a popular choice due to its longevity.
- Galvanized Steel: Known for durability and strength, making it ideal for high-rainfall regions. Steel diverters are usually heavier and more resilient but require rust-resistant coating.
- Copper: Often chosen for aesthetic reasons, copper diverters develop a natural patina over time. They are durable and can last a lifetime, though they come at a higher cost.
Size and Placement
Proper sizing ensures that the diverter captures sufficient water flow:
- Width: Rain diverters typically range from 2 to 8 feet. For doorways, shorter diverters often suffice, while longer diverters work well in roof valleys.
- Placement: For best results, place the diverter above areas that require protection, such as over doorways or in roof valleys where water naturally collects.
Matching Diverter to Roof Type
Consider the compatibility of your roof material:
- Asphalt Shingles: Work well with most diverters. Installation is relatively simple with minimal adjustments.
- Metal Roofs: Require more specialized installation to ensure the diverter attaches securely without damaging the roof.
- Tile Roofs: More challenging to work with due to tile fragility; copper or aluminum diverters are often used, as they can be custom-fitted around tiles.
How to Install a Rain Diverter On Your Roof: Step-by-Step Guide?
Installing a rain diverter can be a straightforward DIY task, but it requires proper tools, preparation, and care to ensure effective placement.
Tools and Materials Needed
Before you begin, gather the essentials like a flat pry bar, aviation snips, 80-grit sandpaper, roofing nails, tripolymer caulk, and paint (to match the roof color).
Safety Precautions
Safety is essential when working on a roof. Use a sturdy ladder, avoid working in wet or windy weather, and always wear gloves and eye protection. For roofs above one story, consider hiring a professional.
Installation Steps
- Prepare the Flashing: Measure and cut the flashing to the desired length. Use sandpaper to smooth out the edges and clean it thoroughly before painting.
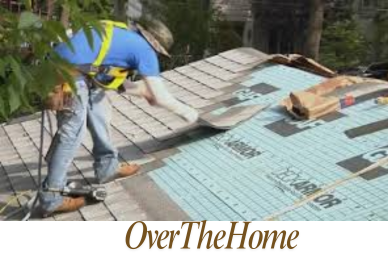
- Prepare the Roof: Gently lift the shingles where the diverter will go, using a flat pry bar to create space.
- Position the Flashing: Place it under the loosened shingles at an angle. If using multiple pieces, overlap them slightly.
- Secure the Diverter: Nail the flashing under the shingles, using roofing nails to secure it without penetrating the shingle face.
- Seal and Finish: Apply caulk to cover nail heads and shingle edges to create a watertight seal.
After installation, test the diverter with a garden hose to check for leaks and ensure water is flowing as expected.
What Are the Alternatives to Rain Diverters?
Rain diverters are an excellent solution, but other water management options may be suitable depending on your home’s needs.
- Gutters and Downspouts: Traditional gutters channel water away to a designated drainage area, making them ideal for homes needing extensive water management.
- Grading and Drainage Systems: By adjusting the ground slope, water can naturally drain away from the building foundation, reducing the risk of pooling around entrances.
- Rain Barrels: Ideal for eco-friendly homeowners, rain barrels collect water from the diverter, allowing for garden irrigation or other uses.
Each alternative has its strengths, and combining solutions often provides the best protection.
FAQ
How much does it cost to install a rain diverter?
DIY rain diverters cost about $30, while professional installation averages $200.
How long does a rain diverter last?
With good maintenance, a metal rain diverter can last around 10 years.
Are rain diverters safe for all roofs?
Yes, but different roof materials may require specific installation techniques to avoid damage.
Do rain diverters require a lot of maintenance?
No, they require minimal maintenance. Annual checks for debris and reapplying caulk when needed are usually sufficient.


