DaVinci Shake Installation | A Homeowner’s Guide
Installing a DaVinci Shake roof can enhance your home’s appearance with the aesthetic charm of natural wood shake while offering the durability of synthetic roofing. DaVinci Shake shingles are crafted from composite materials, combining beauty with resilience against extreme weather conditions.
This guide will walk you through the basics of installing a DaVinci Shake roof, so you can achieve a beautiful, weather-resistant, and long-lasting roof for your home.
What is DaVinci Shake?
DaVinci Shake roofing shingles are premium composite shingles that mimic the look of natural wood shakes but are designed to be more durable, environmentally friendly, and low maintenance. DaVinci Shake shingles resist splitting, fading, and mold, and they don’t require the regular upkeep that natural wood shakes demand.
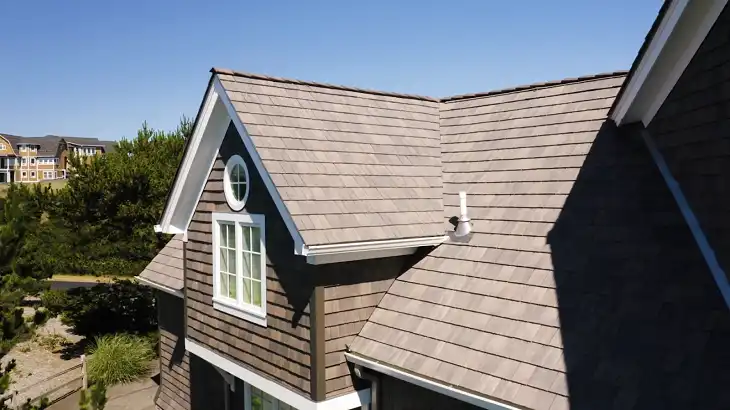
Figure: A house with DaVinci Shake installed
Available in a range of colors and profiles, DaVinci Shake is known for its realistic wood-grain appearance, UV-resistant color, and Class A fire rating.
Benefits of DaVinci Shake Roofing
DaVinci Shake offers several benefits beyond the classic look of traditional shakes:
- Longevity: Designed to last over 50 years with minimal maintenance.
- Weather Resistance: Composite material withstands harsh weather conditions, including high winds, hail, and fire.
- Eco-Friendly: Made from recyclable materials, reducing environmental impact.
- Cost-Effective: Although the initial cost is higher than traditional shingles, reduced maintenance and long lifespan make it a cost-effective choice.

How to Install DaVinci Shake?
Before we start working on this exciting DIY project, let’s review the tools and materials we’ll need for a smoother operation.
Tools:
- Ladder
- Nail gun or hammer
- Roofing nails
- Utility knife
- Chalk line
- Measuring tape
- Safety equipment (goggles, gloves, harness)
Materials:
- DaVinci Shake shingles (choose your style and color)
- Roofing underlayment
- Drip edge
- Flashing
- Roof vents (if necessary)
Once you’re ready and equipped with the things mentioned above, it’s time to kickstart our journey.
Step 1: Prepare the Roof Surface
- Inspect the Roof Decking: Before you start installing the shingles, ensure the roof deck is in good condition. Repair or replace any damaged or rotting areas.
- Install Underlayment: Apply a high-quality underlayment over the entire roof deck, which provides an extra layer of moisture protection. Overlap each row of underlayment by at least 6 inches to prevent leaks.

- Install the Drip Edge: Place the metal drip edge along the eaves of the roof to protect against water infiltration. Nail the drip edge securely to the roof deck.


Step 2: Plan and Measure
Use chalk lines to mark straight reference points on the roof deck, which help ensure an even and straight layout for each row of shingles. Start by snapping a chalk line 1/2 inch up from the eaves to set the first row, then measure and mark additional lines for each row based on the shingle dimensions.

This will help keep each row evenly spaced, aligned, and ensure the final appearance is symmetrical and professional.

Step 3: Start Installing the Shingles
Installing the shingles consists of 3 steps.
1. Install the Starter Course
The starter course is the first row of shingles at the bottom edge of the roof. Place this row so that it overhangs the edge by about 1/2 inch, which allows water to run off effectively.
This row serves as a base layer that subsequent rows will be layered on top of. Align the shingles along the chalk line and nail them in place using four nails per shingle.
2. Nail the Shingles
After securing the starter course, begin with the next row of shingles. Nail each shingle according to DaVinci’s guidelines—typically, using two nails per shingle.
Make sure the nails are placed at the designated locations on the shingle to maintain the proper hold against wind lift and other forces. For added security, use a pneumatic nail gun set to an appropriate pressure to prevent over-driving nails.

3. Overlap Each Row
DaVinci Shake shingles are installed in an overlapping pattern to mimic the staggered appearance of traditional wood shakes. Lay each row so it slightly overlaps the one below it (specific overlap distances are often noted in the manufacturer’s instructions). This provides extra protection from wind-driven rain and creates the layered texture DaVinci Shake is known for.
Step 4: Apply Flashing and Vents
Roof flashing, which is typically metal, protects vulnerable areas of the roof such as valleys, vents, skylights, chimneys, and any other points where different sections meet. Start by laying flashing along roof valleys, extending up the roof by 6 to 12 inches for solid coverage.
Flashing should also be applied around chimneys and skylights, overlapping the shingles. Seal each piece with roofing cement to prevent leaks.
Install Roof Vents
Adequate ventilation is crucial for maintaining a healthy roof and preventing moisture buildup. Roof vents should be installed according to local codes and building recommendations. Each vent will typically require flashing and sealing to ensure there are no gaps where water could penetrate.
Step 5: Install Ridge Shingles
After covering the main sections of the roof, you’ll install ridge shingles along the roof’s peak. Ridge shingles are designed to cover this area seamlessly, offering a polished look and additional weatherproofing.
1. Align the Ridge Shingles
Start at one end of the ridge and align the first ridge shingle perpendicular to the main shingles, with an overhang on each side. Use nails to secure each shingle, positioning them on either side of the ridge.
2. Overlap Each Ridge Shingle
Just like the main shingles, ridge shingles are installed with an overlap to keep the roof watertight. Continue along the length of the ridge until you reach the other end. Use extra nails and roofing cement if needed to secure the final shingle and create a finished appearance.

Step 6: Inspect and Clean Up
After installation, it’s important to check the roof carefully. Ensure each shingle is firmly in place, and look for any misalignments, exposed nails, or areas where shingles may be lifted. These could lead to leaks or future damage, so address any issues promptly.
Clean up any packaging materials, leftover shingles, or other debris from the installation area. Clear away loose nails and tools from the roof and the ground around the property. This step is essential for safety and ensures a clean, completed project.
Frequently Asked Questions
What are DaVinci shakes made of?
DaVinci Shake roofs are crafted from high-quality virgin resins, UV and thermal stabilizers, and a specialized fire retardant for enhanced durability and longevity.
How much does a DaVinci shake roof cost?
A DaVinci slate roof typically costs between $14.00 and $20.00 per square foot.
Conclusion
DaVinci Shake shingles offer a premium, durable, and eco-friendly alternative to traditional wood shakes, enhancing both curb appeal and property value. Although installation can be a DIY project for the experienced, professional installation is recommended for best results.

