How to Put Gravel on a Flat Roof: A Step-by-Step Guide
Adding gravel to a flat roof can significantly extend its lifespan by providing protection against UV rays, fire, and mechanical damage. The gravel layer acts as a ballast, stabilizes the roofing system, and helps manage water drainage effectively. This guide will walk you through the step-by-step process to put gravel on a flat roof, covering everything from preparation to maintenance.
What Types of Flat Roofs Are Suitable for Gravel?
Gravel is typically used on two primary types of flat roof systems:
- Built-Up Roof (BUR): A traditional system made up of multiple layers of asphalt and reinforcing fabrics, typically topped with gravel to hold down the roofing materials and provide durability.
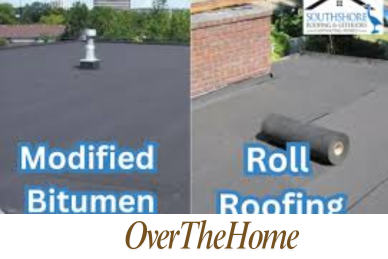
- Modified Bitumen Roofs: An evolution of BUR, these asphalt-based roofs use polymer-modified materials and sometimes have a gravel layer to increase their fire and weather resistance.
Both these systems benefit from the additional gravel layer because it protects the underlying membrane from UV radiation, prevents cracking, and adds a layer of insulation.
Why Use Gravel on Flat Roofs?
Gravel offers several practical advantages for flat roofs, including:
- Thermal Protection: The gravel acts as a shield against direct sunlight, reducing heat absorption and regulating internal temperatures.
- Fire Resistance: A 0.25–0.5 inch gravel layer significantly enhances fire resistance. In fact, gravel-ballasted roofs have a Class A fire rating, which is the highest level of fire protection for roofing materials.
- Protection Against Wind and Physical Damage: It keeps the roofing materials in place and provides a buffer against foot traffic.
Materials and Tools Needed
Before starting the project, gather the necessary materials and tools:
| Material/Tool | Description |
| Gravel | Typically pea gravel (0.25–0.5 inch diameter) or crushed stone. |
| Roofing Membrane | EPDM, TPO, or another roofing membrane if not already installed. |
| Gravel Spreader or Rake | For even distribution of gravel across the roof. |
| Gloves and Goggles | Safety equipment to protect hands and eyes during the installation. |
| Sealant or Roofing Cement | For minor repairs and to seal any exposed membrane areas. |
| Moisture Barrier or Insulation | Optional layer to increase the roof’s thermal and waterproofing properties. |
Putting Gravel on a Flat Roof: Step-by-Step
Step 1: Inspect the Existing Roof Membrane
Inspect the entire roof surface for any of the following issues:
- Cracks or Blisters: Look for visible splits or raised sections, as these indicate areas of potential water penetration.
- Membrane Deterioration: Check for worn-out patches or areas where the membrane feels brittle or thin.
- Exposed Seams: Make sure the seams between membrane sections are tightly sealed.
If any issues are found, repair them using sealant or roofing cement before proceeding to the next step.
Step 2: Clean the Roof Surface Thoroughly
Gravel will adhere better and distribute more evenly on a clean surface. Use a broom or blower to remove all dirt, dust, and debris. Pay special attention to:
- Corners and Roof Edges: These areas are more prone to debris accumulation, which can prevent even gravel distribution.
- Drainage Areas: Ensure that water pathways are clear to avoid creating blockages.
Step 3: Install the Roofing Membrane (If Not Already Installed)
If your flat roof does not have a membrane yet, this step is essential. Use EPDM or TPO roofing membranes, which are highly durable and flexible for flat roofs. Here’s how:
- Lay Out the Membrane: Start from one end of the roof and roll out the membrane across the entire surface. Make sure to overlap seams by at least 6 inches.
- Secure the Membrane: Use adhesives or mechanical fasteners depending on the roof structure.
- Smooth Out Wrinkles: Use a heavy roller to eliminate any air pockets or wrinkles, ensuring a flat, secure surface.
Step 4: Apply the Gravel Layer Evenly
The gravel layer should be applied to a depth of about 0.25–0.5 inches. Distribute it evenly across the roof using a gravel spreader or rake. The goal is to create a uniform layer that covers the entire membrane without clumping or bare spots.
Key Areas to Focus On
- Around HVAC Units or Roof Penetrations: These areas are more susceptible to damage, so ensure the gravel coverage is even and not piled up.
- Roof Edges and Parapets: Leave a slight gap between the gravel and roof edges to facilitate water runoff.
Pro Tip: Leave Drainage Zones
It’s essential to leave gravel-free pathways around drainage zones to prevent blockages. Typically, a 6-inch diameter around drains should remain clear of gravel.
Step 5: Compact and Secure the Gravel
After distributing the gravel, use a hand tamper or compactor to press it down, ensuring it stays in place. This step is crucial, especially in windy regions where loose gravel can be blown away.
Step 6: Regular Maintenance and Upkeep
To ensure the longevity and effectiveness of your gravel layer, implement a regular maintenance schedule:
- Inspect Every Six Months: Check for bare spots, displaced gravel, and signs of wear.
- Replenish Gravel as Needed: Add more gravel to areas where it has shifted or been depleted over time.
A well-maintained gravel roof can last 20–30 years or longer, depending on environmental factors and material quality.
What Are Some Common Issues of Using Gravel on Flat Roofs? And How to Fix Them
Gravel Displacement
If you notice gravel accumulating in one area or being blown off, it may be due to improper initial compaction or wind uplift. To fix this, reapply the gravel and secure it using a heavier compactor or by adding larger ballast stones around the edges.
Membrane Exposure
If parts of the membrane are visible, it indicates gravel displacement. Add more gravel and press it down firmly to cover exposed areas.
Wrapping Up
Putting gravel on a flat roof not only protects the underlying membrane but also enhances the roof’s overall durability, energy efficiency, and aesthetic appeal. By following the steps outlined above, you can ensure a successful gravel application that will last for decades with minimal upkeep. If your roof has complex features or is a larger commercial project, consider consulting with a professional roofing contractor to guarantee a flawless installation.


