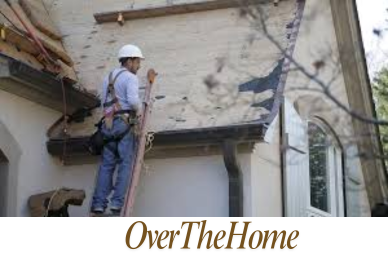
How to Remove a Satellite Dish from Your Roof
Removing an old, unused satellite dish from your roof is a project many homeowners decide to take on. Getting rid of an eyesore while also avoiding the cost of hiring a professional makes removing a dish yourself an appealing option. However, it’s important to keep safety in mind above all when working on your roof.
Follow this guide for step-by-step instructions on how to properly and safely remove a roof-mounted satellite dish.
Step 1: Gather the Right Tools and Materials
Removing a securely mounted dish takes the right tools for the job. Attempting to detach bolts and brackets by hand can be dangerous and ineffective.
Some essential items you’ll need are:
- A sturdy ladder that extends above the roofline
- A safety harness to clip onto a secure anchor point for fall prevention
- An adjustable wrench or socket set for removing nuts and bolts
- Both Phillips and flathead screwdrivers
- Pliers and cable cutters for disconnecting cables
- A power drill if screws need to be removed from roof sheathing
- Duct tape and labels to organize and mark cables
- Trash bags for gathering debris and old equipment, and
- roofing sealant or shingles for sealing holes and repairs
Step 2: Take Safety Precautions
Working on your roof brings obvious risks that need to be minimized. Only attempt removal on a clear, dry day with no chance of rain or lightning, as slick shingles greatly amplify fall risks. Wear sturdy, slip-resistant shoes and work gloves to provide traction and hand protection against blisters from tools.
Check for any overhead power lines near the roof and avoid contact, as electrocution is a very real danger. Inspect the roof before starting and clear any debris or tripping hazards.
Step 3: Disconnect Cables and Power
Before attempting to remove the dish itself, all connections need to be severed, both for safety and simplicity. Shut off electrical power for the dish either at your home’s breaker box or by unplugging any transformers. This eliminates the chance of shocks.
Follow all cables from the dish into your home and detach them from any satellite receivers or power sources inside. Label each cable clearly with tape so reassembly is straightforward if ever reinstalling the dish. Seal up any holes made in your home’s exterior walls from the old cabling with caulk or other weatherproof materials to prevent moisture intrusion and pests.
Step 4: Remove Mounting Hardware
Modern satellite dishes typically attach to roofing in one of two ways – a roof-anchored pole mount or L-shaped mounting brackets screwed into the roof decking.
For pole mounts:
- Use a hacksaw, reciprocating saw, or even an angle grinder to cut through the mounting pole. Wear eye protection against debris.
- Once the pole is detached, pull it off the roof and scrape away any remaining adhesive or roofing material.
For roof-screwed brackets:
- Using a power drill with the appropriate bit or a socket wrench, locate the lag screws or nuts holding the mounting bracket in place.
- Gradually loosen each fastener while supporting the dish to prevent it from crashing down onto the roof prematurely. Take care not to strip screw heads.
- As screws come loose, carefully lift the dish away from the roof surface. Have an assistant support the weight from below if possible.
Step 5: Extract the Dish from the Roof
With cables disconnected and mounting screws removed, it’s time to get the dish off the roof itself. This step requires care to avoid accidents. If working alone, position yourself to lift one edge of the dish and gently slide/push it to the roof edge while crawling backward slowly.
For larger dishes, have one person lift while someone below helps guide it over the edge – communication here is key. As you approach the roof edge, get the dish situated so it can be easily lowered down.
Step 6: Inspect and Repair Roof Damage
After removal, closely inspect areas beneath where the dish was mounted. Screws and adhesives often leave holes or damaged shingles behind. Identify and seal over any lag screw holes using roofing sealant.
For bigger openings, cut shingle patches of the same size and material to cover holes before sealing down. Check for cracked, bent, or torn areas on shingles that were underfoot mounts and replace individual damaged shingles as needed. Use tube sealant, and extra flashing for more extensive damage.
Step 7: Clean Up and Dispose of Old Equipment
For cleanup, place any loose screws, bolts, and roof debris into durable trash bags for disposal. Break down and bend metal antenna parts to make the dish more compact for recycling.
Consult your city’s bulk waste pickup program for disposal procedures for larger metal objects if no local dish recycling exists. And with that, pat yourself on the back for a job well done – your roof is now satellite dish-free!
FAQs
What if I can’t reach the dish or parts of the roof safely?
If the dish is positioned in a hard-to-access area or your roof has precarious pitches, it’s best to hire a professional roofer or satellite dish installer to handle the removal. Don’t risk injury in dangerous circumstances.
Do I need to patch holes in my shingles?
You should seal over any holes or gaps left behind from the removal process to prevent leaks. Use roofing sealant, flashing and shingle patches to cover openings.
What do I do with the old coaxial cable?
Coaxial cable can likely be recycled, so look into cable recycling options in your community. If none, the cable can be disposed of with your regular household waste.
How do I remove adhesive mounts or stripped screws/bolts?
Adhesive can be scraped with a putty knife. For stubborn glue, use adhesive remover chemicals. Stripped screws may need to be drilled out or cut with a Dremel rotary tool.
Can I leave anything behind?
All components of the old satellite dish should be completely removed, including cables, mounts, and hardware. Partial removal creates safety issues and roof damage over time.
