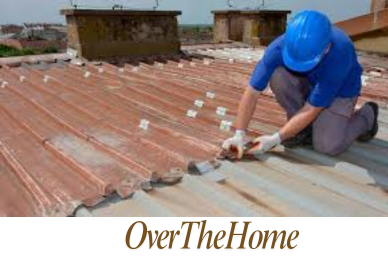
How to Overlap Metal Roofing Lengthwise?
When installing metal roofing, overlapping the panels lengthwise is a technique sometimes required for longer roofs. Done right, it can ensure durability, proper sealing, and a cleaner look; done wrong, it can lead to leaks, structural instability, and increased maintenance. This guide will walk you through the detailed steps of overlapping metal roofing lengthwise, addressing the tools, materials, and best practices you’ll need for success.
What’s Lengthwise Overlapping
Lengthwise overlapping is the method of connecting metal roofing panels along their length. This approach is typically needed for larger roofs where custom panels may still be too short. Unlike side laps (overlaps along the width), which are straightforward and common, lengthwise overlaps should be limited, as they introduce additional seams and possible points of vulnerability.
When done correctly, lengthwise overlaps improve structural stability and help prevent water infiltration. Overlapping panels where they are supported by purlins or beams can make the connection stronger and longer-lasting. This strategy becomes particularly important in high-wind areas where secure roofing is vital.
Step-by-Step Guide to Lengthwise Overlapping
1. Measure and Plan
Accurate measurements set the foundation for a good installation. Start by measuring the roof length, allowing for overhangs and any gaps needed at the ridge. Ideally, each panel should overlap by at least 6 inches. If the roof is exceptionally long, multiple overlaps may be necessary, but keep these to a minimum to avoid weak points.
To determine the number of panels required:
- Measure the roof span and divide by the panel length.
- Allow for 6-inch overlaps per connection.
For optimal stability, plan to position overlaps directly over structural supports, such as purlins or trusses, whenever possible. Overlapping at these points provides additional strength to the connection.
2. Prepare the Panels
Preparing panels for installation is crucial to ensure that each seam is watertight and smooth. If you need to cut the panels, use tools like tin snips or power shears to achieve a clean edge that will not damage the butyl tape later. After cutting, inspect and smooth the edges to prevent any sharp points from interfering with the butyl tape’s adhesive properties.
3. Position the First Panel
Starting at the bottom edge of the roof, align the first panel squarely with the edge. This ensures that subsequent panels will follow the correct alignment. Place the panel so that it’s slightly angled against the prevailing wind direction. This setup is essential, as it helps prevent water from being driven under the overlaps during storms.
4. Overlap and Secure the Panels
When overlapping panels, position the second panel to cover the end of the first by at least 6 inches. This overlap distance is enough to create a secure joint while minimizing exposed seams. Apply a strip of double-sided butyl tape along the middle of the overlap area. The tape provides a crucial watertight seal that prevents water from seeping into the joint.
Once aligned, use screws to fasten the panels, driving them along the strip of butyl tape. Ensure each screw pierces both panels, securing them to the underlying structure. Use a screw spacing of about 12 inches along the overlap, depending on the roofing type and local weather conditions.
5. Continue Overlapping and Securing
Repeat the overlap process with each subsequent panel, keeping overlap distances and alignment consistent. A chalk line can help maintain straight seams and avoid a crooked appearance on the roof. Adjust the placement of screws as necessary to ensure a firm connection over each overlap and to secure the panels to the underlying structure.
6. Final Panel and Ridge Gap
When you reach the last panel, allow a 2-inch gap at the ridge if ridge vents are being installed for ventilation. This gap can be adjusted based on the vent type and ridge cap design. Secure the final panel carefully to ensure a clean appearance and consistent finish.
Other Metal Roofing Tips and Best Practices
Importance of Butyl Tape
Using butyl tape along the overlap is essential for a watertight seal. This adhesive tape is highly effective in preventing water penetration. Apply it consistently along the entire length of the overlap to ensure there are no gaps in coverage.
Fastener Placement
The placement of screws is critical to the stability of the overlap. Each fastener should penetrate both panels and the butyl tape beneath. For most roofing types, a 12-inch screw spacing is effective, but this may vary depending on the panel profile and structural needs. Always use screws designed for metal roofing to avoid corrosion and ensure durability.
Wind Direction
Overlapping panels opposite the direction of prevailing winds minimizes the risk of wind uplift. This setup not only enhances stability but also prevents rain from being driven under the seam.
Structural Support
Where possible, overlap panels over purlins or other structural supports. This added support reinforces the connection, especially in areas prone to heavy snowfall or high winds. Consulting with a structural engineer may be helpful to determine appropriate purlin spacing and ensure maximum roof durability.
Common Metal Roof Overlaping Mistakes and How to Avoid Them
1. Inaccurate Measurements
Incorrect measurements can lead to gaps or improperly sized panels. Carefully measure each section and verify measurements before cutting or installing panels.
2. Ignoring Wind Direction
Installing panels without considering wind direction can lead to water infiltration and wind damage. Position panels so that the overlap faces away from the wind.
3. Improper Butyl Tape Application
Partial or uneven tape application compromises the seal. Ensure that the tape covers the entire overlap length to prevent gaps.
4. Inadequate Fastening
Using the wrong fasteners or spacing them too far apart weakens the roof. Use screws designed for metal roofing and space them according to the panel and support structure requirements.
For additional protection in extreme weather conditions, consider using a sealant along the overlap. When working around roof penetrations, such as chimneys or vents, take extra care to ensure that overlaps and seals are secure. Regularly step back to check alignment, making adjustments as necessary to maintain a straight and visually appealing roof.
FAQ
How much should I overlap metal roofing panels lengthwise?
Overlap by at least 6 inches to ensure a strong, leak-resistant connection.
What tools do I need to cut metal roofing panels?
Use tin snips or power shears for clean cuts that won’t damage the edges.
Why is butyl tape necessary for overlapping?
Butyl tape creates a watertight seal between overlapping panels, preventing leaks.
Can I overlap metal roofing panels without structural support?
Overlapping panels without support can weaken the seam. Place overlaps over purlins or beams for added stability.
What spacing should I use for screws along the overlap?
A 12-inch screw spacing is generally effective but may vary based on panel type and weather conditions.
Does the wind direction affect panel installation?
Yes, overlapping against the wind direction helps prevent wind-driven water from entering seams.
Summary
Proper lengthwise overlapping of metal roofing panels is essential for a durable, weather-resistant roof. By following these steps—measuring carefully, securing overlaps with butyl tape and screws, and placing overlaps over structural supports—you can achieve a professional-quality installation that withstands the elements. For added assurance, always consult manufacturer guidelines and local building codes to ensure compliance and safety.
