How to Convert a Flat Roof to a Pitched Roof?
A flat roof, while functional, can be prone to drainage issues and may lack the aesthetic appeal of a pitched roof. A pitched roof, with its sloped design, offers improved drainage efficiency, potential for additional living space, and enhanced curb appeal.
In this article, we’ll talk about the process of converting a flat roof to a pitched roof, covering essential planning considerations, design options, structural requirements, cost factors, and step-by-step instructions.
Why You Should Convert Your Flat Roof to a Pitched Roof
- Better Drainage: Pitched roofs allow water to run off more effectively, reducing the risk of standing water and potential leaks. Studies show that a properly designed pitched roof can improve drainage efficiency by up to 75% compared to a flat roof.
- Increased Attic Space: The sloped design of a pitched roof creates additional attic space, which can be utilized for storage, living areas, or even converted into functional rooms, providing more versatility for homeowners.
- Enhanced Aesthetics: A well-designed pitched roof can significantly improve a home’s curb appeal, adding architectural interest and potential value. Check out these before-and-after visuals to see the transformative effect:
- Conversion Process Overview: The conversion process typically involves deconstructing the existing flat roof, assessing and reinforcing the structure as needed, framing the new pitched roof, installing sheathing and underlayment, and finally, adding the roofing material (shingles or metal). The visuals below provide a step-by-step overview:
Planning and Considerations
Before embarking on a flat-to-pitched roof conversion, it’s crucial to consider various factors to ensure a successful project.
Building Codes and Permits
Obtaining the proper permits is essential to ensure your project complies with local building codes and regulations. Failure to do so can result in costly fines or even legal issues down the line. Here’s a table outlining typical permit costs by region:
| Region | Average Permit Cost |
| Northeast | $800 – $1,200 |
| Southeast | $600 – $1,000 |
| Midwest | $500 – $900 |
| Southwest | $700 – $1,100 |
| West | $800 – $1,400 |
Check with your local building department or consult a licensed contractor for specific requirements and resources in your area.
Roof Design Options
When converting to a pitched roof, you have several design options to choose from, each offering its own unique advantages and considerations:
- Gable Roofs
This simple triangular roofing option offers the best drainage efficiency. It also provides ample attic space. It is cost-effective but has limited styling options.
- Hip Roofs
Hip roofs offer slopes on all four sides and have excellent wind and weather resistance. It has a balanced appearance and is generally more durable. However, hip roofs might require a more complex framing. This may lead to higher construction costs.
- Shed Roofs
Shed roofs offer a single-sloped design. These roofs are simple and clean and are more suitable for extensions. They require very little maintenance but may introduce water poling issues in some cases.
To help you choose the right roof design, consider factors like your home’s architectural style, local climate conditions, budget, and personal preferences. Use this handy decision-making flowchart:
Structural Considerations
Before proceeding with the conversion, it’s essential to assess the existing structure’s ability to support the additional weight and load of a pitched roof. Factors like the age of the home, construction materials, and local weather conditions can impact the structural integrity.
In some cases, structural reinforcement may be necessary to ensure the safety and longevity of the new pitched roof. Consulting a structural engineer can help determine the necessary reinforcements and provide guidance on meeting building code requirements.
Here’s a table outlining the average costs for structural engineer consultations:
| Service | Average Cost |
| Initial Consultation | $300 – $600 |
| Detailed Structural Analysis | $1,000 – $3,000 |
| Construction Drawings and Specifications | $2,000 – $5,000 |
How Much Does it Cost to Convert a Flat Roof
The cost of converting a flat roof to a pitched roof can vary significantly depending on several factors, including the size of your home, the roof design chosen, materials used, and labor costs in your area. Here’s a detailed breakdown of potential cost factors to consider:
- Materials:
- Lumber (trusses/rafters, framing, etc.): $3,000 – $10,000
- Sheathing (plywood, OSB): $1,000 – $4,000
- Underlayment: $300 – $1,500
- Roofing material (shingles, metal, etc.): $2,000 – $15,000
- Insulation: $1,000 – $5,000
- Gutters and downspouts: $500 – $2,500
- Labor Costs:
- Deconstruction of existing flat roof: $1,000 – $3,000
- Framing and sheathing installation: $3,000 – $10,000
- Roofing material installation: $2,000 – $8,000
- Interior modifications (if needed): $1,000 – $10,000+
Converting a Flat Roof to a Pitched Roof
Now that you’ve planned and prepared, let’s dive into the step-by-step process of converting your flat roof to a pitched roof.
Step 1: Deconstruction of the Existing Flat Roof
The first step in the conversion process is to safely remove the existing flat roof. Follow these guidelines:
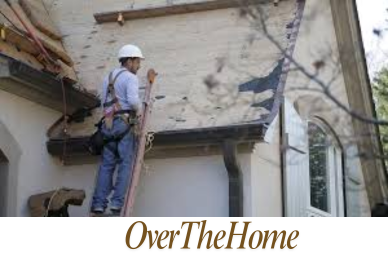
- Safety Precautions: Always prioritize safety by wearing proper protective gear (hard hats, goggles, gloves, etc.) and ensuring a secure working environment.
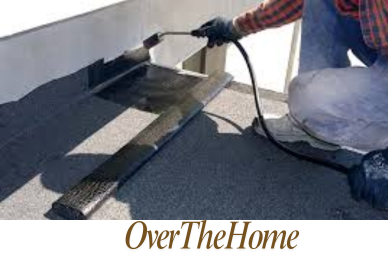
- Removal Process: Start by carefully removing any roofing materials (shingles, tiles, etc.) and properly disposing of them according to local regulations. Then, remove the underlying sheathing, insulation, and framing.
- Disposal: Consult your local waste management authority for proper disposal methods and locations for old roofing materials.
Step 2: Building the Roof Structure
Once the existing flat roof is removed, it’s time to construct the new pitched roof structure:
- Trusses vs. Rafters: Trusses are pre-engineered, triangular framing components that offer superior strength and span capabilities, while rafters are individual framing members that require more on-site labor. Trusses are often preferred for their efficiency and cost-effectiveness.
- Framing Process: The framing process involves installing the trusses or rafters, creating the desired roof shape, and ensuring proper spacing and anchoring to the existing walls or support structure. Consult detailed framing diagrams and guides for your chosen roof design.
- Weight Capacity: Ensure the trusses or rafters you select can safely support the anticipated loads, including the weight of the roofing materials, potential snow loads, and any additional living spaces. Refer to this table for safe weight capacities:
| Truss/Rafter Type | Safe Weight Capacity (per linear foot) |
| Engineered Trusses | 30 – 60 lbs |
| Dimensional Lumber Rafters | 10 – 25 lbs |
Step 3: Sheathing and Underlayment
- Sheathing Materials: The sheathing, typically made of plywood or oriented strand board (OSB), provides a solid base for the roofing material. Plywood offers superior strength and moisture resistance, while OSB is more economical.
- Ventilation Gaps: Proper ventilation is crucial to prevent moisture buildup and extend the life of your roof. Leave gaps between the sheathing and insulation to allow for airflow.
- Underlayment: The underlayment acts as an additional moisture barrier and provides a smooth surface for the roofing material installation. Choose an underlayment suitable for your chosen roofing type (asphalt, metal, etc.).
Step 4: Shingle or Metal Roof Installation
- Shingles vs. Metal Roofing:
- Shingles (asphalt, clay, slate) offer a traditional look, good insulation properties, and a wide range of styles and colors. However, they have a shorter lifespan and require more maintenance.
- Metal roofing (steel, aluminum, copper) is durable, long-lasting, and energy-efficient but can be more expensive upfront and may be noisier during rainfall.
- Installation Guides: Refer to detailed manufacturer instructions and guides for proper installation techniques for your chosen roofing material, ensuring a watertight and secure fit.
- Material Comparisons: Consider the table below when selecting your roofing material, weighing factors like lifespan, maintenance requirements, and noise insulation:
| Roofing Material | Average Lifespan | Maintenance Needs | Noise Insulation |
| Asphalt Shingles | 15 – 30 years | Moderate | Good |
| Clay/Slate Tiles | 50 – 100+ years | Low | Excellent |
| Metal (Steel) | 40 – 70 years | Low | Fair |
| Metal (Aluminum) | 40 – 60 years | Low | Poor |
Additional Considerations
While the roof structure and roofing material are the main components, there are several additional factors to consider for a successful conversion.
Insulation and Ventilation
Proper insulation is essential for energy efficiency and comfort. Popular options include spray foam insulation (highest R-value) and batt insulation (more economical).
Similarly, adequate ventilation prevents moisture buildup, extends the life of your roof, and improves energy efficiency. Incorporate soffit vents (intake) and ridge vents (exhaust) into your design.
Additionally, you should consider the recommended insulation R-value varies by climate zone. Refer to the table below from the Department of Energy for guidance:
| Climate Zone | Recommended R-Value |
| Zone 1 | R-30 to R-49 |
| Zone 2 | R-38 to R-60 |
| Zone 3 | R-49 to R-60 |
| Zone 4 | R-60 to R-75 |
| Zone 5 | R-60 to R-75 |
Gutters and Downspouts
Properly sized gutters and downspouts are crucial for effective water drainage, preventing water damage, and protecting your home’s foundation.
To determine the appropriate gutter size, consider your roof area and typical rainfall in your region. Consult roofing manufacturer resources for sizing guidelines and installation instructions.
Ensure proper slope (1/4 inch per 10 feet) for efficient drainage, secure gutter hangers every 2-3 feet, and install downspouts at strategic locations to direct water away from the foundation.
Interior Modifications (if necessary)
Depending on the pitch and design of your new roof, interior modifications may be required to accommodate the changes. Common modifications include:
- Raising ceilings to create more headroom
- Adjusting wall heights or angles
- Reconfiguring room layouts
Hiring qualified contractors is crucial for any structural modifications to ensure safety and compliance with building codes. Here’s a table outlining average costs for common interior modifications:
| Modification | Average Cost |
| Raising Ceilings | $3,000 – $10,000 |
| Adjusting Wall Heights/Angles | $1,500 – $5,000 |
| Room Layout Reconfiguration | $5,000 – $15,000 |
FAQs
Can a flat roof support a green roof after conversion?
While it is possible to install a green roof (vegetated roof system) on a converted pitched roof, there are several factors to consider. The roof structure must be designed and reinforced to support the additional weight of the soil, plants, and drainage systems. Proper waterproofing and root barrier layers are also essential. Consult with a structural engineer and experienced green roof contractor to evaluate the feasibility and requirements for your specific project.
How does a pitched roof affect energy efficiency?
A well-designed and properly insulated pitched roof can improve a home’s energy efficiency in several ways:
- Enhanced attic ventilation prevents moisture buildup and reduces cooling loads.
- Increased attic space allows for better insulation, reducing heat transfer.
- Overhanging eaves provide natural shading, minimizing solar heat gain.
- Metal roofing materials with reflective coatings can reduce cooling costs.
Are there alternatives to a complete pitched roof conversion?
If a full conversion is not feasible or desired, there are alternative options to consider:
- Installing a raised roof section or dormer can create additional headroom and living space without a complete conversion.
- Building a pitched roof over an existing flat roof can improve drainage and aesthetics while avoiding full deconstruction.
- Applying a coating or membrane system can extend the life of an existing flat roof and improve drainage.
Can I convert my flat roof to a pitched roof myself?
While ambitious DIYers may be tempted to take on this project themselves, it is generally not recommended. Roof conversions involve complex structural modifications, framing techniques, and safety considerations. Even minor miscalculations or errors can compromise the integrity of the roof and potentially put your family at risk. It is strongly advised to hire experienced, licensed roofing contractors and follow all local building codes and regulations.
